
by Anastasia Marchenko
Pocket Hedgehog Free amigurumi crochet pattern


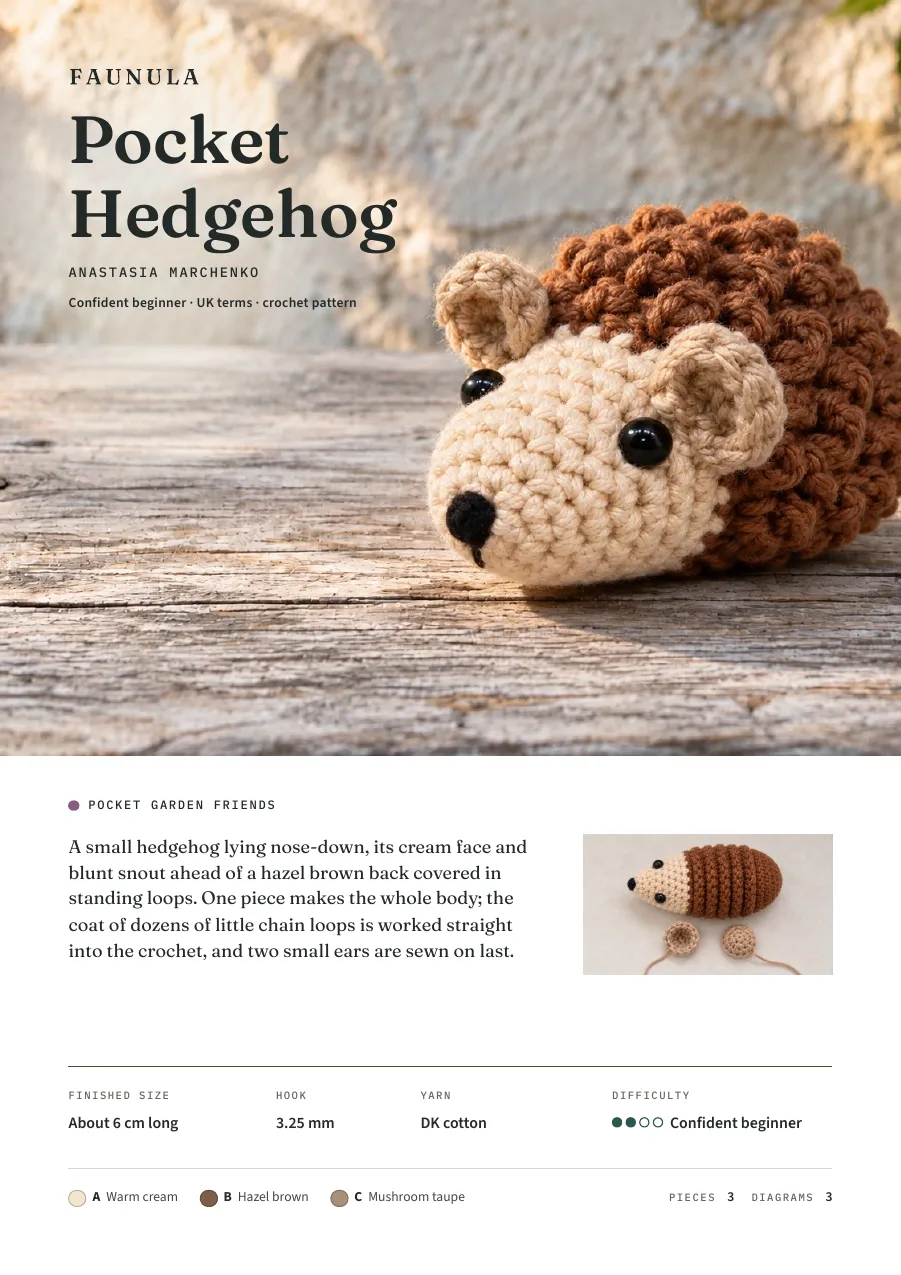
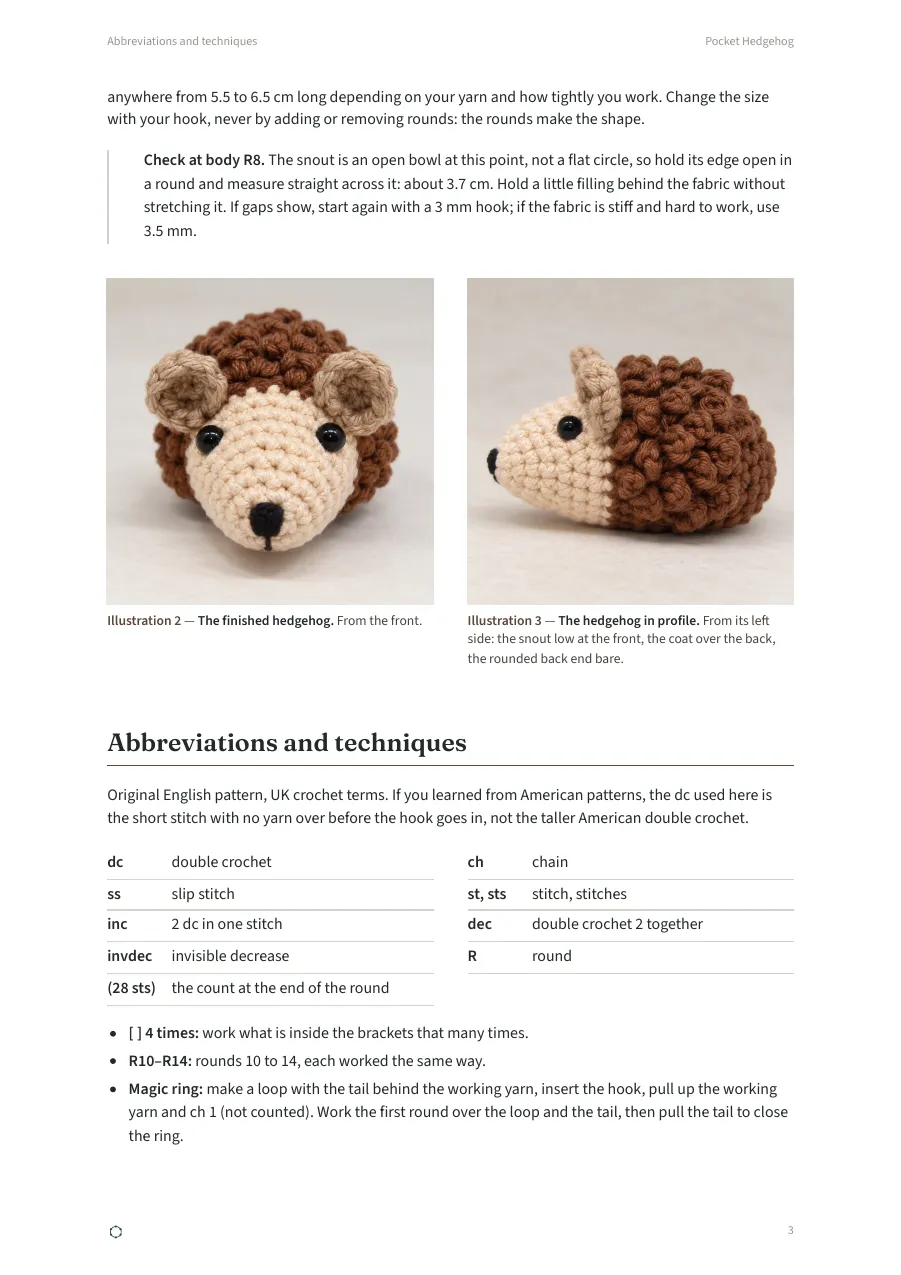
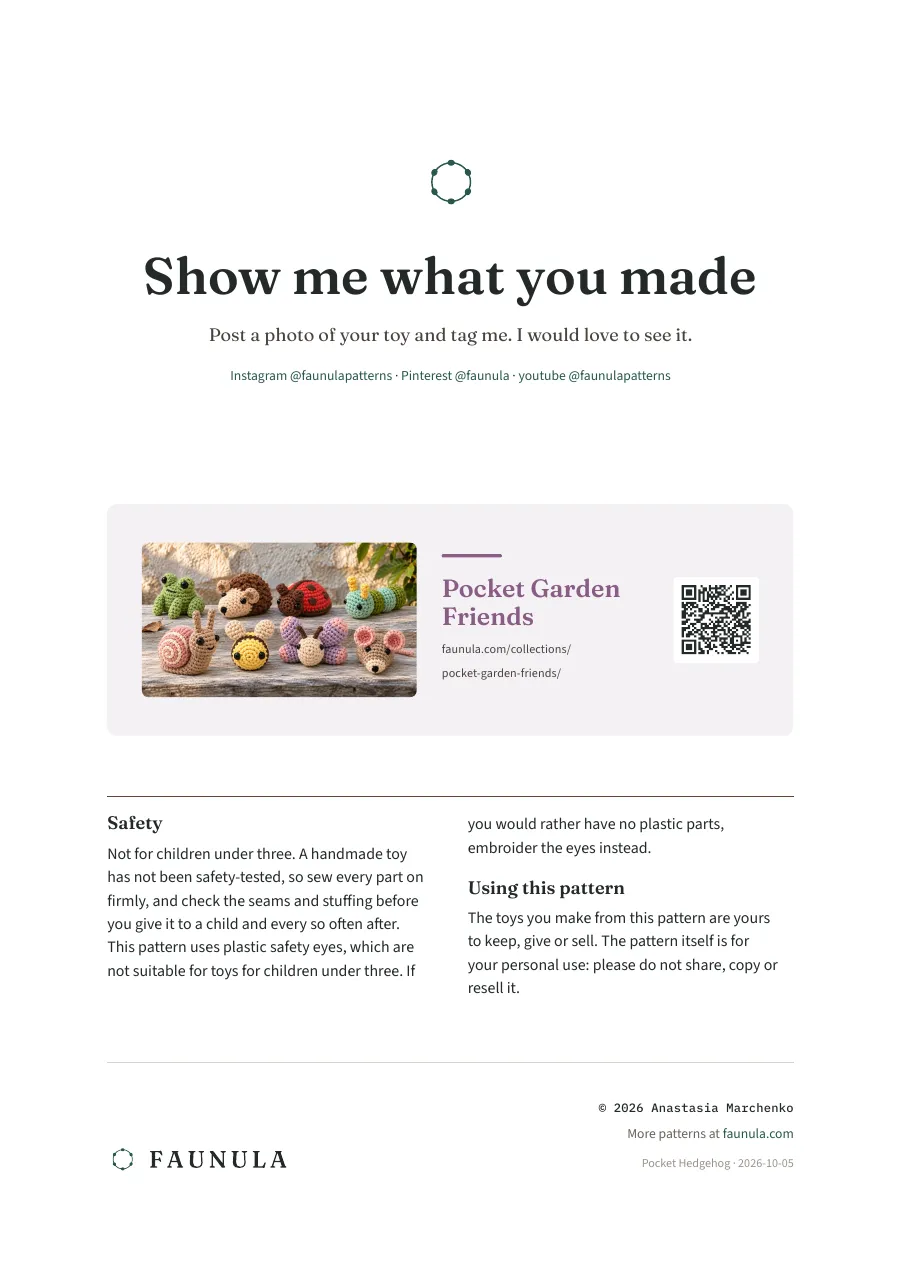
A hedgehog lying nose-down, its blunt snout ahead, with a warm-cream face, a dark nose, two small taupe ears and a hazel-brown coat of standing spines over its back.
- About 6 cm (2¼ in) long
- Confident beginner
- 3 pieces
- About 3 hours
- 7 languages
- DK cotton, 3.25 mm hook
Free pattern
Free
Every round and every diagram is here on the page, free to read with no sign-up.
Prefer paper? The printable PDF
The same pattern laid out for print: numbered pages, and each diagram beside the rounds it explains.
In 7 languages details
- English A4, 15 pages · US Letter, 16 pages
- Deutsch A4, 17 pages
- English (UK) A4, 16 pages
- Español A4, 16 pages
- Français A4, 17 pages
- Nederlands A4, 16 pages
- Українська A4, 16 pages
- 9 illustrations · 3 diagrams · 15 pages on A4
Made by hand
Photographs of real makes, crocheted from the written pattern.
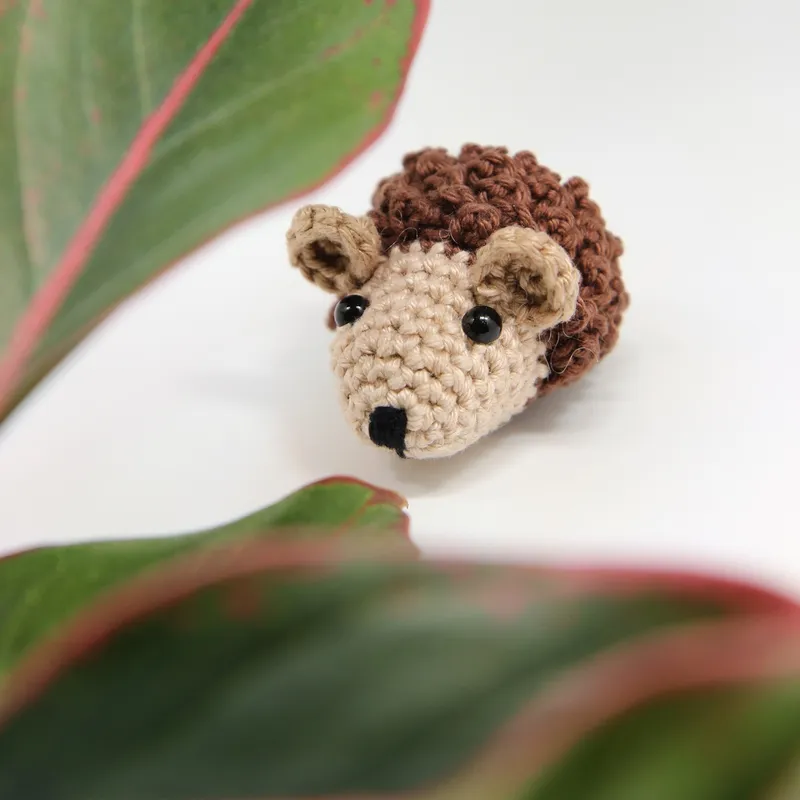
Made by Anastasia in Círculo Amigurumi cotton on a 3.25 mm hook. 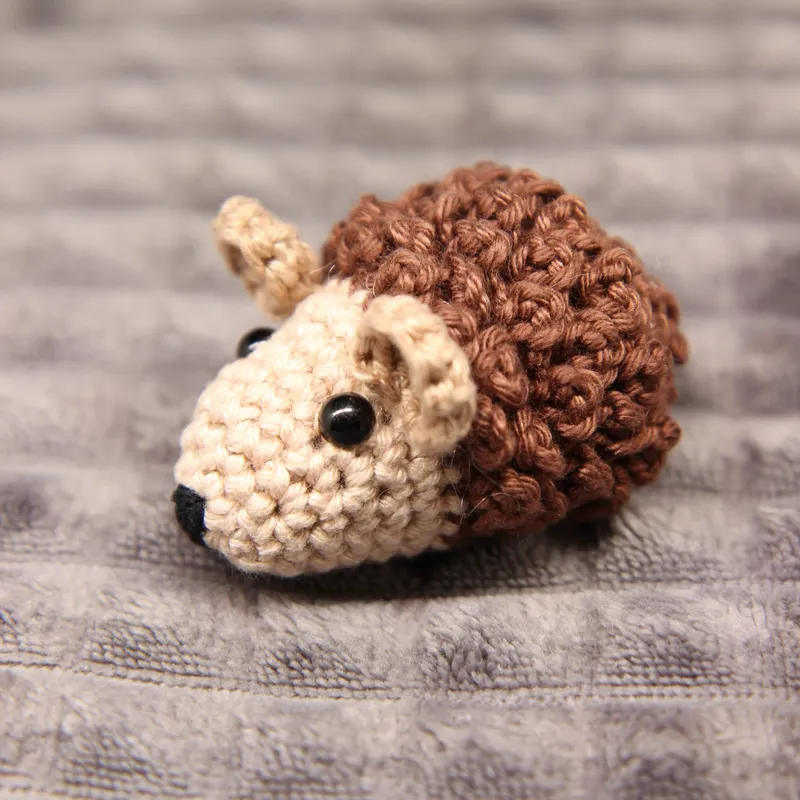
From the side: the looped spines over the back, the cream face in front. 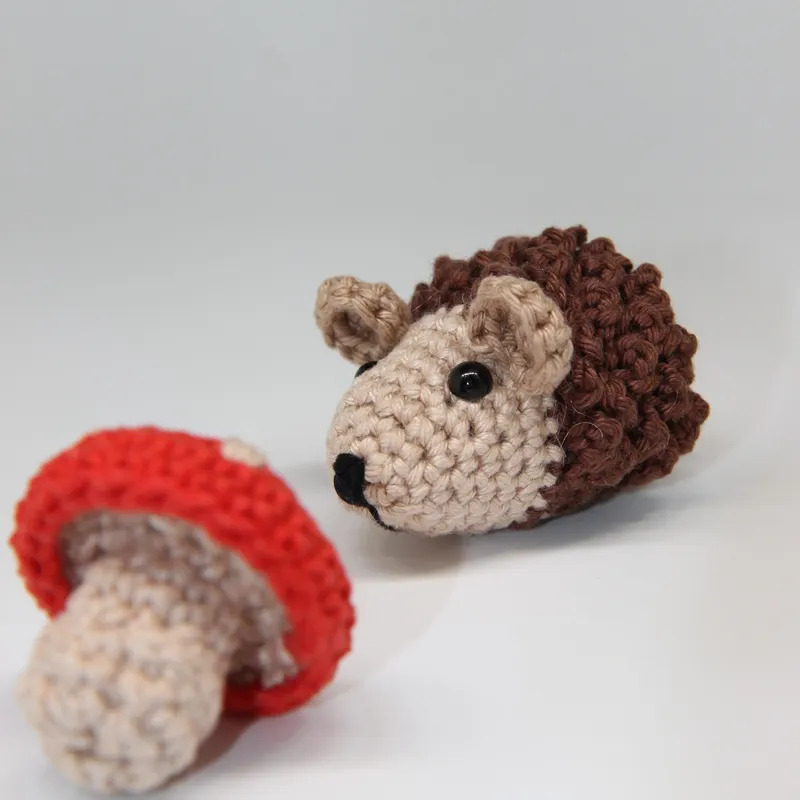
Beside the mushroom from the collection's Extras.


Free colouring pages
Pocket Hedgehog to colour by number, with answers and a gift card. Print at home, no sign-up.
A4 · 6 pages
About this amigurumi pattern
- How it is made
- The body is one continuous spiral from the snout back. Under the coat the rounds are taken into the back of the stitches only, which leaves a row of loops waiting on the surface; the coat is then worked into those loops once the body is filled, spine by spine, so the back is textured and the face stays smooth. Only the ears are sewn on. There is no wire and no hard part but the safety eyes, and the pattern shows how to embroider them instead.
- Skills
- magic ring
- spiral rounds
- increases and invisible decreases
- changing colour at the start of a round
- rounds in back loops only
- fitting safety eyes
- working chain picots into the free front loops of a finished body
- sewing small pieces to a filled body
- satin stitch and one straight stitch on the finished body
- In the wild
- A hedgehog's face, chest, belly, throat and legs carry no spines: they are covered in coarse, grey-brown fur instead.Source: European hedgehog — The Mammal Society
Materials
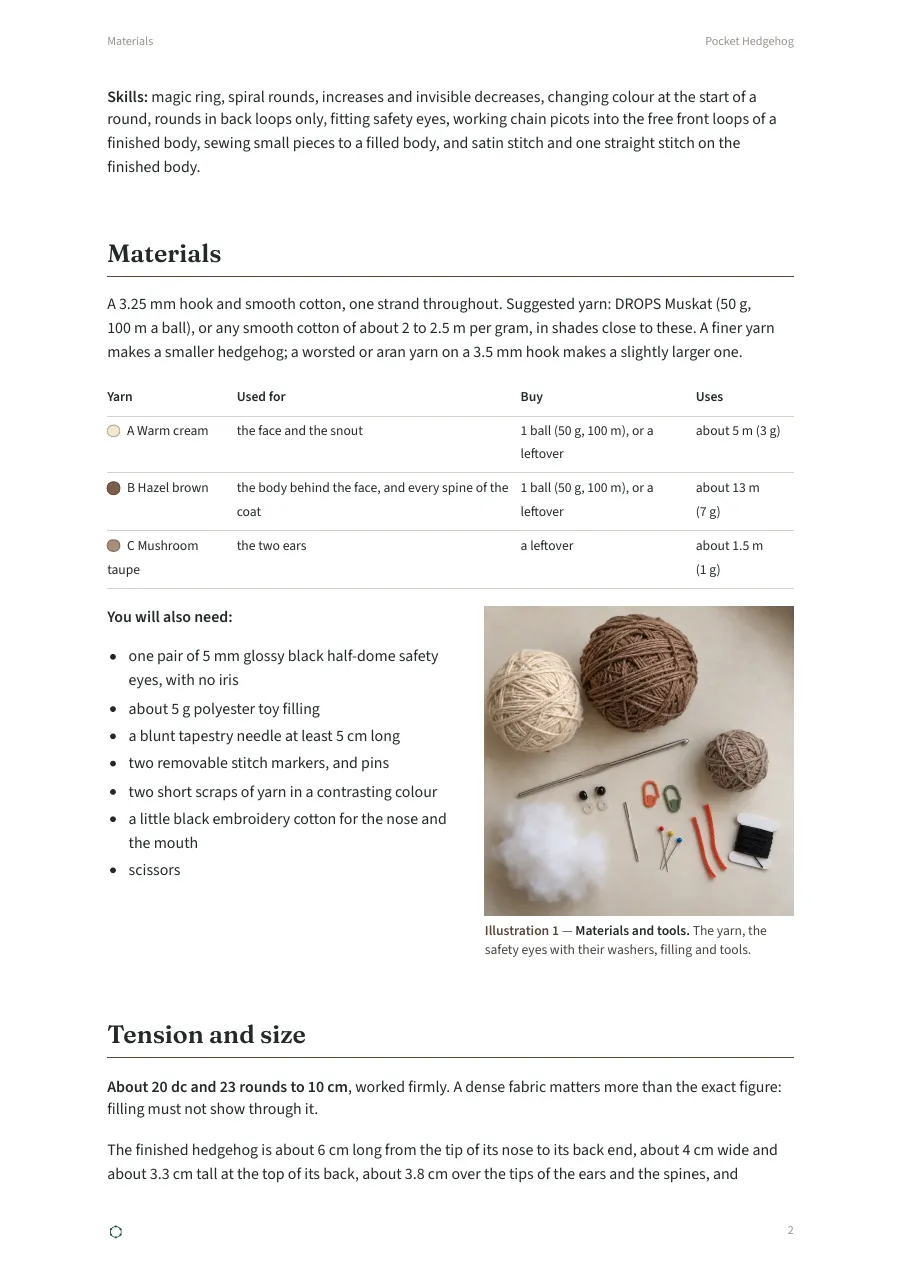
A 3.25 mm hook and smooth cotton, one strand throughout. Suggested yarn: DROPS Muskat (50 g, 100 m a ball), or any smooth cotton of about 2 to 2.5 m per gram, in shades close to these. A finer yarn makes a smaller hedgehog; a worsted or aran yarn on a 3.5 mm hook makes a slightly larger one.
| Yarn | Used for | Buy | Uses |
|---|---|---|---|
| A Warm cream | the face and the snout | 1 ball (50 g, 100 m), or a leftover | about 5 m (3 g) |
| B Hazel brown | the body behind the face, and every spine of the coat | 1 ball (50 g, 100 m), or a leftover | about 13 m (7 g) |
| C Mushroom taupe | the two ears | a leftover | about 1.5 m (1 g) |
You will also need:
- one pair of 5 mm glossy black half-dome safety eyes, with no iris
- about 5 g polyester toy filling
- a blunt tapestry needle at least 5 cm long
- two removable stitch markers, and pins
- two short scraps of yarn in a contrasting colour
- a little black embroidery cotton for the nose and the mouth
- scissors

Tension and size
About 20 dc and 23 rounds to 10 cm, worked firmly. A dense fabric matters more than the exact figure: filling must not show through it.
The finished hedgehog is about 6 cm long from the tip of its nose to its back end, about 4 cm wide and about 3.3 cm tall at the top of its back, about 3.8 cm over the tips of the ears and the spines, and anywhere from 5.5 to 6.5 cm long depending on your yarn and how tightly you work. Change the size with your hook, never by adding or removing rounds: the rounds make the shape.
Check at body R8. The snout is an open bowl at this point, not a flat circle, so hold its edge open in a round and measure straight across it: about 3.7 cm. Hold a little filling behind the fabric without stretching it. If gaps show, start again with a 3 mm hook; if the fabric is stiff and hard to work, use 3.5 mm.


Abbreviations and techniques
Original English pattern, UK crochet terms. If you learned from American patterns, the dc used here is the short stitch with no yarn over before the hook goes in, not the taller American double crochet.
- dc
- double crochet
- ch
- chain
- ss
- slip stitch
- st, sts
- stitch, stitches
- inc
- 2 dc in one stitch
- dec
- double crochet 2 together
- invdec
- invisible decrease
- R
- round
- (28 sts)
- the count at the end of the round
- [ ] 4 times
- work what is inside the brackets that many times.
- R10–R14
- rounds 10 to 14, each worked the same way.
- Magic ring
- make a loop with the tail behind the working yarn, insert the hook, pull up the working yarn and ch 1 (not counted). Work the first round over the loop and the tail, then pull the tail to close the ring.
- Spiral rounds
- no joining and no turning. Mark the first stitch of each round and move the marker up as each round begins.
- T, and counting from it
- T is the top of the back. You mark it with a scrap at the R6 pause and again at R9, and every position in this pattern is counted from it along the round — T+3 means three stitches on from T towards the hedgehog's left, T−3 three stitches the other way. The rounds' first stitches run along the underside, where nothing shows.
- Changing colour
- work the last stitch of the round before until two loops are left on the hook, drop the old colour to the inside of the piece, yarn over with the new colour and pull it through both loops. The small step where the colours meet sits at the start of the round, on the underside.
- Holding the loop
- when the pattern stops mid-body, slip the loop from your hook onto a spare stitch marker so nothing unravels, and put it back on the hook to carry on.
- Back loops only
- insert the hook under the back loop of each stitch only, the loop farther from you. The front loops you skip stay on the outside as a raised ridge — and those ridges are what the coat is worked into, so they are not decoration but the pattern's own scaffolding. They cannot be added afterwards.
- Invisible decrease (invdec)
- insert the hook under the front loop only of each of the next 2 stitches, yarn over, pull through both front loops, yarn over, pull through the 2 loops on the hook.
- Double crochet 2 together (dec)
- insert the hook and pull up a loop in each of the next 2 stitches, then yarn over and pull through all 3 loops on the hook. It is used once, in R15, and there in back loops only — an invisible decrease works into the front loops, and on that round the front loops are the coat's last ridge.
- A spine
- with B and the hook, from the outside of the finished body, insert the hook under one free front loop of a ridge, pull up a loop, ch 3, then ss into that same free loop. That makes a small brown loop of chain standing away from the fabric; if one lies flat against the body instead, the end of Step C says what to do. Carry the yarn along behind the ridge to the next spine; do not pull it tight between them, or the ridge gathers.
- Safety eyes
- the post goes through the fabric from the outside, between two stitches; the washer is pressed onto the post from the inside, ridged side towards the fabric, until it clicks. Once the washer is on it does not come off again, so every eye is placed and looked at before its washer goes on.
- Fasten off and secure
- cut the stated tail and pull it through the last loop. Pass it through the backs of at least five stitches on the inside, back through three, and trim.
Order of work. Make the body first, from the nose backwards; it carries almost everything. The eyes go in at the R7 pause, while you can still reach a washer from inside, and the six ridges are made on the way past at R10–R15 — neither can be done later. The nose, the mouth, the coat and the ears all go onto the closed, filled body, in that order. Make the two ears at any time. Diagram 2, Assembly order sets the whole sequence out with what is open at each step.
Body — make 1
Yarn A Warm cream B Hazel brown
Start with a magic ring. Work in spiral rounds.
- R1A6 dc in the magic ring.6 sts
- R2Ainc 6.12 sts
- R3Adc 12.12 sts
- R4A[dc 2, inc] 4 times.16 sts
- R5Adc 16.16 sts
- R6A[dc 3, inc] 4 times.20 sts
Pause here with the loop held. Count 10 stitches on from the stitch your round marker is in; that eleventh stitch is the top of the back, T. Mark it with a short scrap of yarn. Everything on this hedgehog is counted from T, so the marker's own side becomes the underside, where the colour step and every round's start are hidden.
- R7Adc 20.20 sts
- Eyes — 5 mm glossy black half-domes, each post through R7 between T+2 and T+3 on the left, T−2 and T−3 on the right. Both posts in and looked at before either washer goes on. Also the nose, a satin oval about 5 mm across covering the magic ring and R1 at the middle of this map, and the mouth, one straight stitch down the underside from R2 to R4.
- Ear seams — three stitches of R8 each side, the cupped side of the ear facing forward.
- The colour line: A ends with R8, B and the coat begin beyond this edge.
- T — the top of the back: the scrap tied through the 11th stitch of R6, which is what every offset on this map is counted from.
Pause here with the loop held and fit the eyes into R7 now, as Step A says. Once a washer is on it does not come off, so both posts go in before either washer does.
- R8A[dc 4, inc] 4 times.24 sts
Change to B at the start of this round.
- R9Bdc 24.24 sts
Pause here with the loop held. Count 12 stitches on from the stitch your round marker is in; that thirteenth stitch is T again, on R9. Mark it with a second scrap of yarn. Every round from here to R14 has 24 stitches and no shaping, so this scrap stands at the head of the straight column you count from when you work the coat. R10 to R15 are worked in back loops only. Each one leaves a ridge of free front loops on the outside; those six ridges carry the coat, and they cannot be added afterwards. R15 decreases as well, and it uses the ordinary dec rather than the invisible decrease, because an invisible decrease works into the front loops and those are the sixth ridge. The step it leaves is the one decrease on this hedgehog that nothing has to hide: the spines stand over it.
- R10–R14Bdc 24 (back loops only).24 sts
- R15B[dc 2 (back loops only), dec (back loops only)] 6 times.18 sts
Both loops again from here. Fill the body firmly. Press the underside flat against the table with your palm as you fill, so the body settles into an oval about 4.0 cm across and 3.3 cm tall rather than staying round; a round body rolls. Keep the front of the snout firm so the face stays blunt.
- R16B[dc, invdec] 6 times.12 sts
- R17Binvdec 6.6 sts
Top up the filling through the small opening, pressing the underside flat once more, then fasten off leaving a 25 cm tail. Thread the tail through the front loop of each of the six R17 stitches in order, pull to close the hole and make one small stitch across the closure, then bury the tail inside the body and trim. Pull the ring tail at the snout tip tight and weave it in inside. The body is now closed and firm; the nose, the mouth, the coat and the ears all go onto it from the outside. Leave both scrap markers in place until the ears are sewn on: every position on the closed body is counted from them.
Ear — make 2
Yarn C Mushroom taupe
Start with a magic ring. Work in spiral rounds.
- R1C6 dc in the magic ring.6 sts
- R2C[dc, inc] 3 times.9 sts
Fasten off, leaving a 20 cm tail for sewing. Pull the ring tail tight and weave it in inside the ear. Do not fill it. Three increases in R2, where a flat circle takes six, make a definite little cup rather than a flat disc: about 1.4 cm across, with the rim standing about 3.5 mm proud of its middle. That is meant: the hollow side is the front of the ear, the cup is what makes it read as an ear rather than a tab, and a cupped single layer should be stiffer than a flat one. About a third of its edge is taken into the seam, so about 1 cm of the ear is clear of it. Make two the same.
Assembly
How positions are given. The first stitch of every round, and the step where the colour changes, run along the hedgehog's underside, where nothing shows. T, the top of the back, is halfway round from it: the stitch the first scrap marks on R6, and the stitch the second scrap marks on R9. T+3 is 3 stitches from T towards the hedgehog's left and T−3 is 3 towards its right. Left and right are always the hedgehog's own: seen from the front, its left is on your right. Count from the scraps, never from the round marker, which drifts in a spiral. Diagram 2, Assembly order shows what happens at each pause and what waits until the body is closed.

Finding the rounds. R1 is the ring at the tip of the snout and each round is the next ring back; R8 is the last cream round, and the brown begins at R9. The six ridges of free front loops are the six raised lines running round the brown body: ridge 1 is the one nearest the face, ridge 6 the one nearest the tail.
Sewing and embroidery stitches:
- Flattened-edge seam: hold the ear's lower edge against the body and catch both loops of one stitch of the ear, then a shallow bar of the body stitch under it without going through to the inside. Work along the seam and back, so both layers of the ear's edge are caught.
- Bury a tail: needle into the body at the seam and out 3 cm away, tug so the end disappears, go back through a nearby stitch and trim flush.
- Satin stitch: straight stitches laid side by side, each from one edge of the shape to the other, close enough that no fabric shows between them. Pull each one until it lies flat without denting the fabric.
- Ends on the closed body: go in at a gap away from the stitching, leaving a 10 cm end, and come up where the stitching starts. When it is done, go down at its end and out through the same gap. Tie the two ends with a double knot, pull gently so the knot slips inside, and trim.
The diagrams are flat drawings of a curved, filled surface: place, pin and look before you fix anything.
- 1Body R1–R6 openThe snout in A from the magic ring to R6 (20 sts). At the R6 pause, count 10 stitches on from the round's first stitch, which lies on the underside, and tie a scrap through the next one: that is T, and every position in this pattern is counted from it.
- 2A. Eyes pausedAt the R7 pause, both posts through from the outside — the left between T+2 and T+3, the right between T−2 and T−3 — with no washers on. Look at the face from the front and from above, move them if you want to, and only then press the washers on from inside. This is the one step that cannot be undone.
- 3Body R8–R15 openR8 in A (24 sts), then B from the start of R9 and a second scrap at T on R9. R10–R15 in back loops only: each leaves a ridge of free front loops, and the 6 ridges are the only thing the coat can be worked into. They cannot be added later.
- 4Body R16–R17 closedFilled firm at the R15 pause with the underside pressed flat against the table, so the body settles into an oval rather than staying round; then R16–R17, topping up through the last opening; the final 6 stitches gathered and the tail buried.
- 5B. Nose and mouth closedIn black embroidery cotton on the closed body: a satin oval over the magic ring and R1 at the tip of the snout, then one straight stitch down the underside midline from R2 to R4. Ends brought out away from the face, tied and pulled inside.
- 6C. Coat closed51 spines in B, ridge by ridge from the front, each a loop pulled up through a free front loop, ch 3 and an ss back into the same loop. Odd ridges take the odd numbers of stitches out from T, even ridges the even ones, to T−8 and T+8 either way; the underside carries none.
- 7D. Ears closedTwo cupped discs, hollow side forward, pinned across three stitches of R8 — T+2 to T+4 on the left, T−2 to T−4 on the right — looked at from the front, then sewn down and the tails buried.
- 8Finish closedBoth scraps and every pin out, the filling settled through the fabric with your fingers, and the hedgehog set down on the table to check that it lies still.
- open — rounds still continue after this step, so the inside of the body can be reached.
- paused — crochet has stopped with the loop held on a marker; the body is still open.
- closed — filled and shut; only surface work, with ends tied and pulled inside.
A. The eyes (at the body's R7 pause)
The body is still open, so a washer can be reached from inside. This is the one step that cannot be taken back. Diagram 1, Face map shows the rounds of the snout from the front, with both eye positions on it.

| Left eye | Right eye | |
|---|---|---|
| Post | R7, between T+2 and T+3 | R7, between T−2 and T−3 |
- Find T on R7: it is the stitch directly behind the scrap you tied on R6. Count 2 stitches towards the hedgehog's left (your right) and push an eye's post through the gap just past the second stitch, from the outside, without its washer.
- Place the other eye the same way on the other side.
- Look at the face from the front: both eyes at the same height on the snout, the same distance from the top, with the cream snout tapering away below them. Look from above: both the same distance back from the nose. Move a post one gap if they are not.
- Press both washers on from the inside, then put the loop back on your hook and carry on with R8.
The eyes sit on the upper sides of the snout, about 2.2 cm apart across a face 3.1 cm wide, well ahead of where the coat will begin.
If you would rather have no plastic parts, embroider the eyes instead: while the body is still open, with black embroidery cotton, work small straight stitches over the same gap, one over another, until a round dot about 5 mm across stands. Knot the ends inside the body.
B. The nose and the mouth (on the closed body)
Both are worked in black embroidery cotton on the finished, filled body. Diagram 1, Face map shows the nose over the magic ring and the mouth running back from it along the underside.
- Thread a needle with an arm's length of black cotton and go in through a gap two or three rounds back from the tip, leaving a 10 cm end, and come up at the edge of the magic ring.
- The nose: satin stitch over the closed ring and the six stitches of R1, the stitches running across the snout, until an oval about 5 mm wide and 4 mm tall is filled with no fabric showing through it. Keep it centred on the ring; look at the snout from the front and from each side as you go.
- The mouth: from the lower edge of the nose, take one straight stitch back along the underside of the snout, about 1 cm long, ending level with R4. It runs straight down the middle, in line with the rounds' first stitches.
- Bring the needle out through the same gap you started at, tie the two ends, pull the knot inside and trim.
Seen from the front the face is a cream snout with two black eyes, a small dark nose at its tip and nothing else; the mouth shows only from below and from a low angle.
C. The coat (on the closed body)
- A spine — into that free front loop, pull up a loop of B, ch 3, ss into the same loop.
- A free front loop left alone. The 7 stitches of the underside carry none, so the hedgehog sits on smooth fabric.
- The ear seams on R8, just ahead of ridge 1: three stitches each side, so the first spines stand behind the ears.
- T — the top of the back: the scrap on R9. Every ridge round carries the same 24 stitches with no shaping, so T is one straight column over all 6 of them.
Fifty-one spines in B, worked into the six ridges of free front loops. They are the same brown as the body, so nothing has to line up perfectly — what matters is that no spine sits directly above another, which is why the ridges alternate. Diagram 3, Coat map shows every one of them, and how far round the sides the coat reaches.

Each ridge takes its spines in the same span, from T−8 to T+8, leaving the seven stitches of the underside bare so the hedgehog sits on smooth fabric. Odd ridges take the odd numbers of stitches out from T; even ridges take T itself and the even numbers.
| Ridge | Round its loops belong to | Spines | Work a spine into the free front loop at each of these |
|---|---|---|---|
| 1 (nearest the face) | R9 | 8 | T−7, T−5, T−3, T−1, T+1, T+3, T+5, T+7 |
| 2 | R10 | 9 | T−8, T−6, T−4, T−2, T, T+2, T+4, T+6, T+8 |
| 3 | R11 | 8 | the same as ridge 1 |
| 4 | R12 | 9 | the same as ridge 2 |
| 5 | R13 | 8 | the same as ridge 1 |
| 6 (nearest the tail) | R14 | 9 | the same as ridge 2 |
- Start with ridge 1, at the near end of the second scrap's column. Find T on the ridge — it is the free front loop directly below the scrap — and count out from it to T−7, the first spine of the ridge.
- Make a spine there: insert the hook under that free front loop from the outside and pull up a loop of B, leaving a 10 cm end hanging; ch 3, then ss into the same loop.
- Carry the yarn loosely along behind the ridge to the next position and make the next spine. Work right along the ridge to T+7 or T+8, whichever this ridge ends on. Do not pull the carried yarn tight, or the ridge gathers and the spines lean together.
- At the end of the ridge, cut the yarn leaving a 10 cm end and pull it through. The ridge's two ends now hang at opposite ends of the ridge. Thread one onto the needle, take it into the body through a gap beside its spine and run it through the inside of the body to come out beside the other end, so both ends sit on the same side. Tie them together in a knot, trim the ends and hide them inside the body.
- Work the other five ridges the same way, each from T−7 or T−8 across to the other side. Ridge 6 sits on R14, the last round at full width, and the round above it decreases — so its loops are a little closer together than the rest. That is meant: it puts the last row of spines out over the rump rather than short of it.
- Stand back and look at the hedgehog from above and from each side: the spines should stand up rather than lie along the back, in rows that break the outline. Push any that have flattened upright with a fingertip.

Working ridge by ridge from the face back is easier than jumping about, and it lets you see the coat grow towards the tail.
D. The ears (last)
Two small taupe discs, hollow side forward, just ahead of the first row of spines. Diagram 1, Face map shows both positions on R8, the last cream round.
| Left ear | Right ear | |
|---|---|---|
| Sewn across | R8, T+2, T+3 and T+4 | R8, T−2, T−3 and T−4 |
- Find T on R8: it lies in the same column as the scrap on R9, one round towards the snout. R8 and R9 have the same 24 stitches and R9 is worked straight into R8, so the column does not shift. Diagram 1, Face map draws that line out to R8.
- Hold an ear with its hollow side facing the snout. About a third of its edge goes into the seam, so the rest stands clear.
- Pin it across the three stitches of its row, its middle over T+3 or T−3, leaning a little outwards and back towards the coat.
- Pin the other ear the same way. Look at the hedgehog from the front: the two ears the same size, the same height and the same distance from T, with the eyes below and in front of them. Look from above: both leaning back by the same amount. Move a pin one stitch if they do not match.
- Sew each ear's lower edge down with a flattened-edge seam, using its tail, and bury the tail inside the body.
The ears are small on purpose: they sit half among the first spines, and only their rounded tops stand clear.
Finishing
Remove any pins and both scraps. Press the hedgehog gently underside-down on the table and roll it under your palm to settle the filling, then push the filling forward into the snout with your fingertips through the fabric so the face stays blunt. Do not block, steam or starch.
Your hedgehog should lie still and low on the table, nose forward and a little down, with its cream face clear of the coat and the spines standing up along the whole of its back. If it rocks or rolls towards one side, press it underside-down on the table again and work the filling flat with your palm; the underside is meant to be a flat oval, not a curve.
Care: spot-clean only, and dry flat away from heat.
What is checked
passed
Stitch check: every round's count recomputed from the stitch record
passed
Placement check: every placement checked against the rounds it names
passed
Diagram check: every diagram checked against the same record
1
finished make from the written pattern
3
photos of finished makes
Using this pattern
The toys you make from this pattern are yours to keep, give or sell. The pattern itself is for your personal use: please do not share, copy or resell it.
Safety
This pattern uses plastic safety eyes, which are not suitable for toys for children under three. If you would rather have no plastic parts, embroider the eyes instead.
Not for children under three. A handmade toy has not been safety-tested, so sew every part on firmly, and check the seams and stuffing before you give it to a child and every so often after.
Illustrations are generated previews. Your finished piece will differ with yarn, hook, tension and stuffing. © 2026 Anastasia Marchenko