
by Anastasia Marchenko
Pocket Caterpillar Free amigurumi crochet pattern


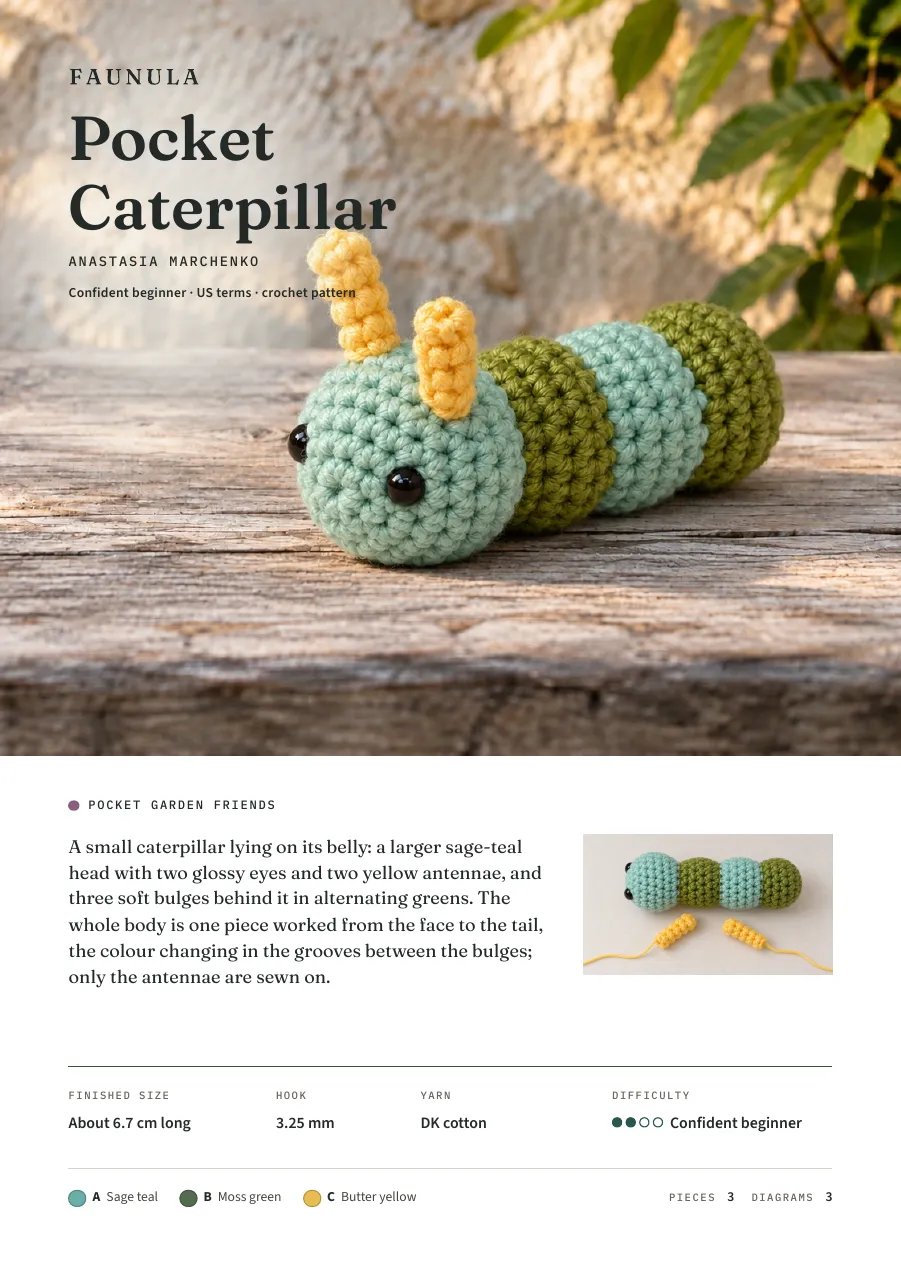
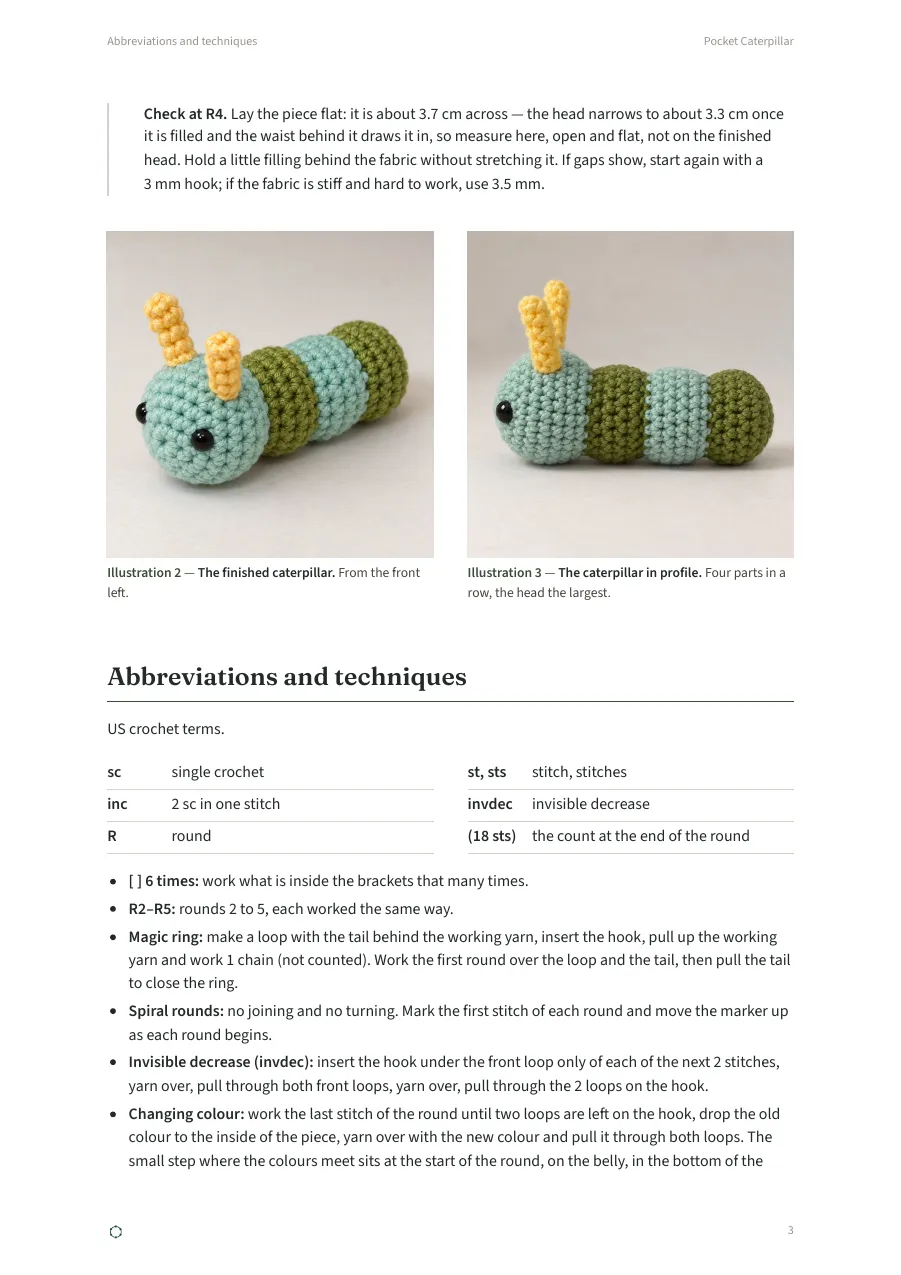
A caterpillar resting on its belly: a large sage-teal head with two glossy eyes and two butter-yellow antennae, and three soft bulges behind it in alternating greens.
- About 6.7 cm (2¾ in) long
- Confident beginner
- 3 pieces
- About 3 hours
- 7 languages
- DK cotton, 3.25 mm hook
Free pattern
Free
Every round and every diagram is here on the page, free to read with no sign-up.
Prefer paper? The printable PDF
The same pattern laid out for print: numbered pages, and each diagram beside the rounds it explains.
In 7 languages details
- English A4, 14 pages · US Letter, 14 pages
- Deutsch A4, 14 pages
- English (UK) A4, 14 pages
- Español A4, 14 pages
- Français A4, 15 pages
- Nederlands A4, 14 pages
- Українська A4, 14 pages
- 9 illustrations · 3 diagrams · 14 pages
Made by hand
Photographs of real makes, crocheted from the written pattern.
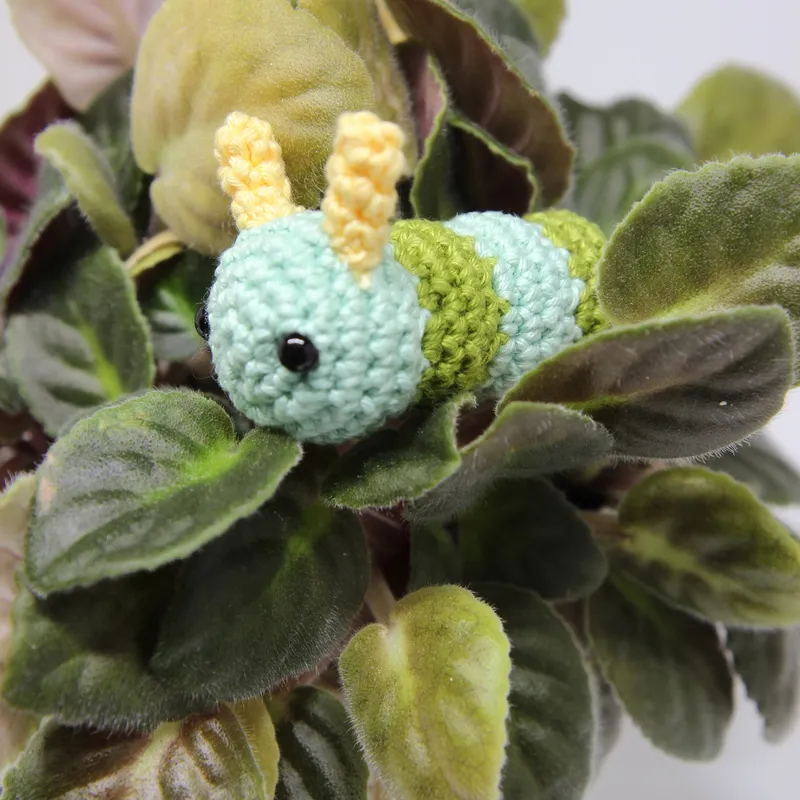
Made by Anastasia in Círculo Amigurumi cotton on a 3.25 mm hook. 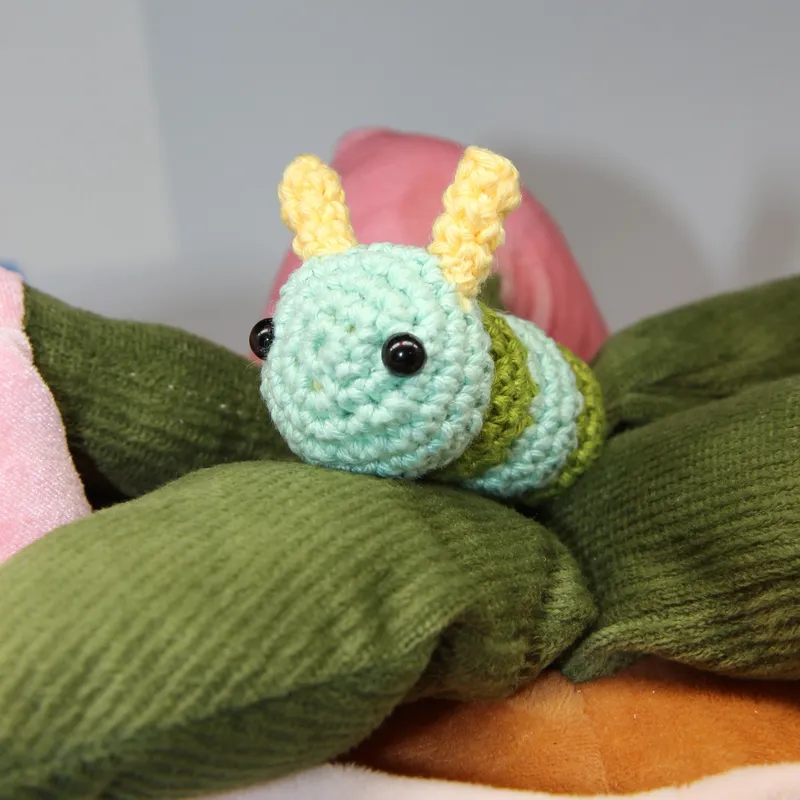
Its bands from the side: green and mint behind the round head. 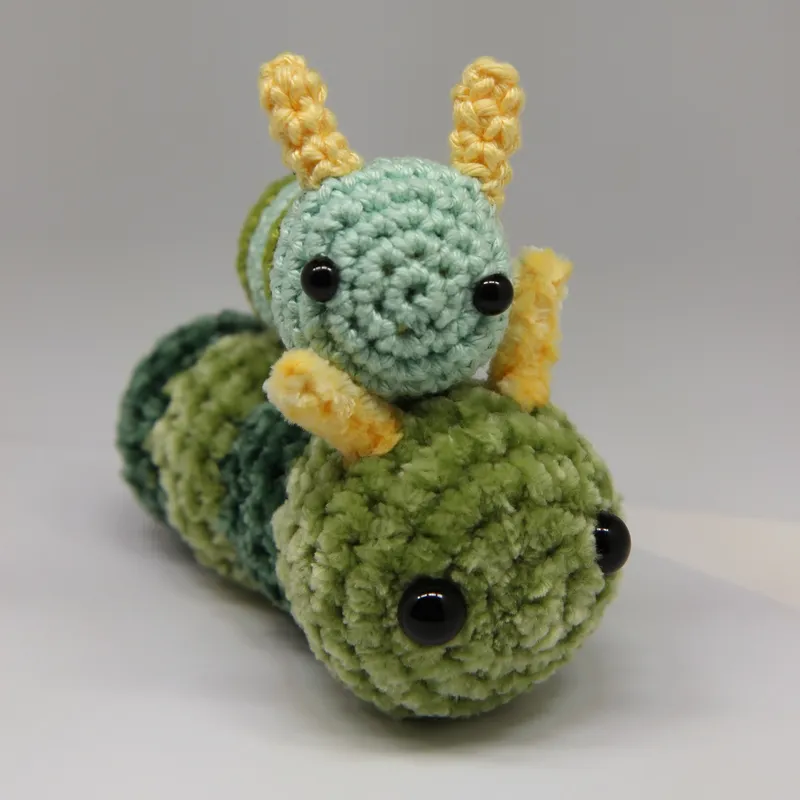
The same counts worked in a plush yarn on a 4.5 mm hook, with the cotton one resting on it. Outside the pattern's yarn class, and not a substitution it offers: the caterpillar comes out about 9 cm long. 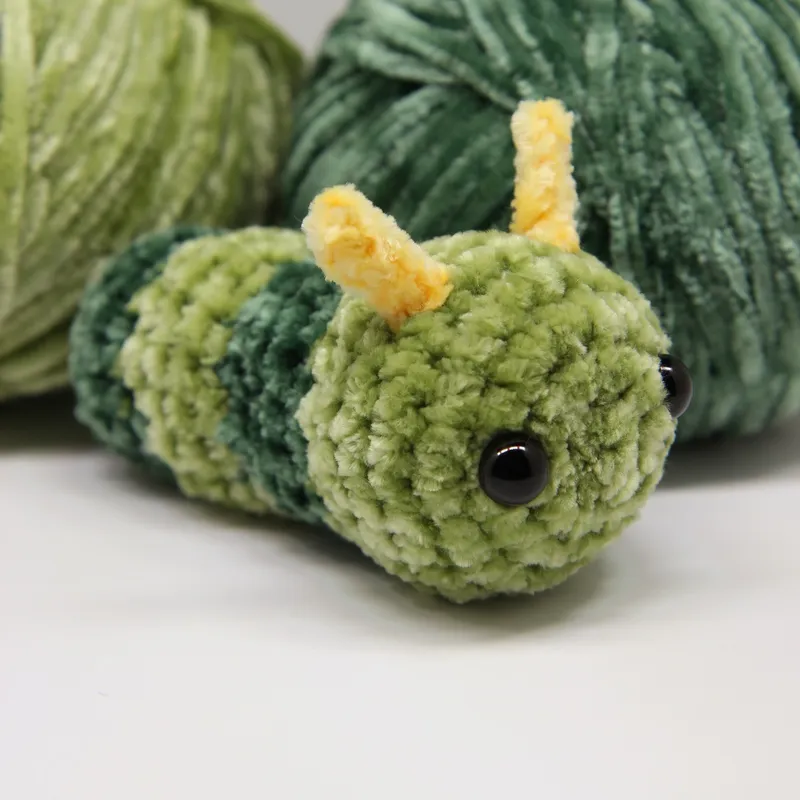
The plush caterpillar in front of balls of its yarn.


Free coloring pages
Pocket Caterpillar to color by number, with answers and a gift card. Print at home, no sign-up.
About this amigurumi pattern
- How it is made
- The head and every bulge are one continuous spiral, shaped by increasing and decreasing in place rather than by joining segments, and filled a little at a time as it grows. Each colour change sits in a waist, where the fabric pulls in and hides the join. Only the antennae are sewn on. There is no wire and no hard part but the safety eyes, and the pattern shows how to embroider the eyes instead.
- Who it is for
- A good first friend alongside the bee, and the shaping it teaches, a bulge at a time, is the one every other body in the set uses.
- Skills
- magic ring
- spiral rounds
- increases and invisible decreases
- changing colour at the end of a round
- filling a body in stages as you go
- fitting safety eyes
- sewing two small tubes to a filled body by their open rims
- In the wild
- A caterpillar's outer skin does not grow with it: when it becomes too small, the caterpillar sheds it, and most caterpillars do this five times.Source: Life Cycle of the Butterfly or Moth — University of Nevada, Reno
Materials
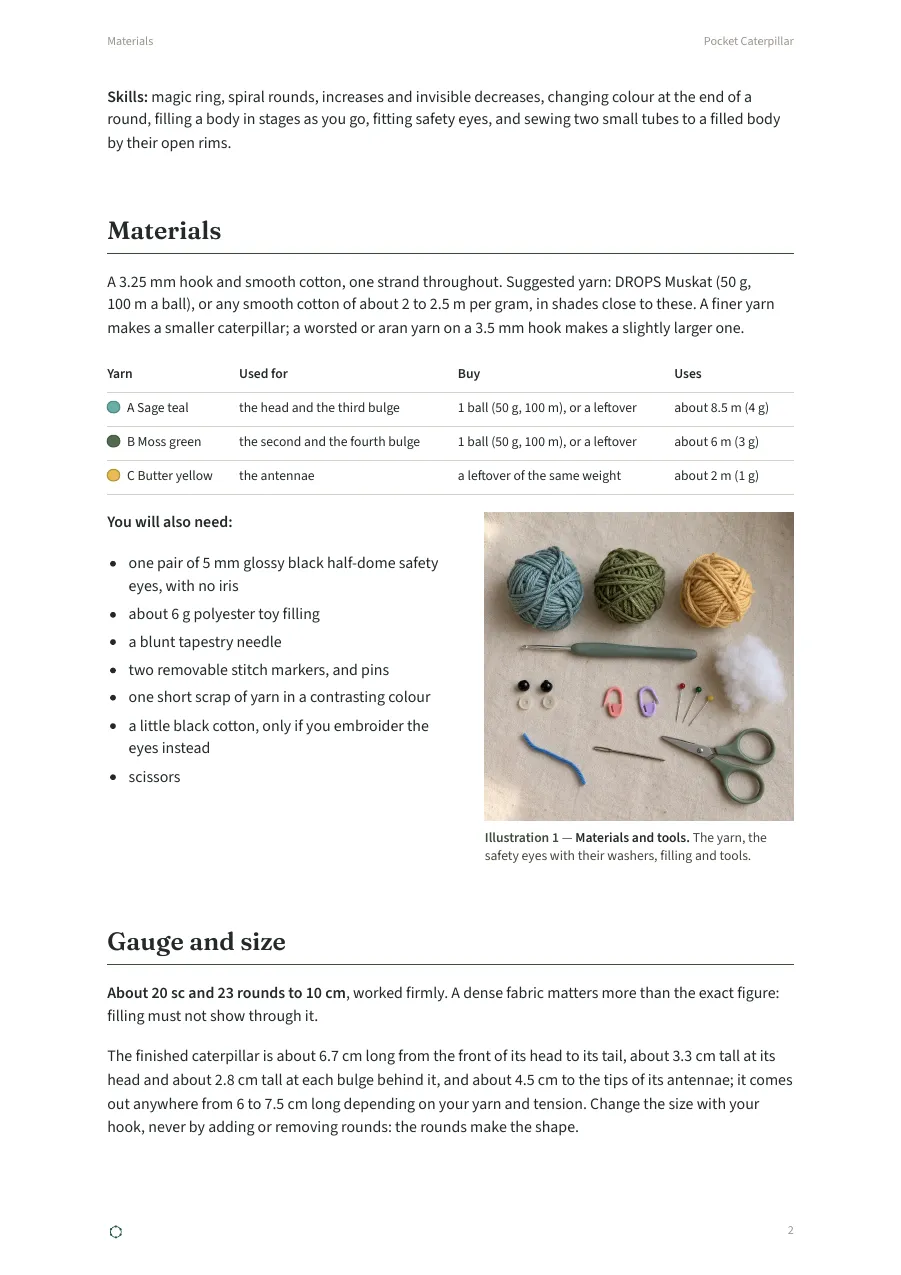
A 3.25 mm hook and smooth cotton, one strand throughout. Suggested yarn: DROPS Muskat (50 g, 100 m a ball), or any smooth cotton of about 2 to 2.5 m per gram, in shades close to these. A finer yarn makes a smaller caterpillar; a worsted or aran yarn on a 3.5 mm hook makes a slightly larger one.
| Yarn | Used for | Buy | Uses |
|---|---|---|---|
| A Sage teal | the head and the third bulge | 1 ball (50 g, 100 m), or a leftover | about 8.5 m (4 g) |
| B Moss green | the second and the fourth bulge | 1 ball (50 g, 100 m), or a leftover | about 6 m (3 g) |
| C Butter yellow | the antennae | a leftover of the same weight | about 2 m (1 g) |
You will also need:
- one pair of 5 mm glossy black half-dome safety eyes, with no iris
- about 6 g polyester toy filling
- a blunt tapestry needle
- two removable stitch markers, and pins
- one short scrap of yarn in a contrasting colour
- a little black cotton, only if you embroider the eyes instead
- scissors

Gauge and size
About 20 sc and 23 rounds to 10 cm, worked firmly. A dense fabric matters more than the exact figure: filling must not show through it.
The finished caterpillar is about 6.7 cm long from the front of its head to its tail, about 3.3 cm tall at its head and about 2.8 cm tall at each bulge behind it, and about 4.5 cm to the tips of its antennae; it comes out anywhere from 6 to 7.5 cm long depending on your yarn and tension. Change the size with your hook, never by adding or removing rounds: the rounds make the shape.
Check at R4. Lay the piece flat: it is about 3.7 cm across — the head narrows to about 3.3 cm once it is filled and the waist behind it draws it in, so measure here, open and flat, not on the finished head. Hold a little filling behind the fabric without stretching it. If gaps show, start again with a 3 mm hook; if the fabric is stiff and hard to work, use 3.5 mm.


Abbreviations and techniques
US crochet terms.
- sc
- single crochet
- st, sts
- stitch, stitches
- inc
- 2 sc in one stitch
- invdec
- invisible decrease
- R
- round
- (18 sts)
- the count at the end of the round
- [ ] 6 times
- work what is inside the brackets that many times.
- R2–R5
- rounds 2 to 5, each worked the same way.
- Magic ring
- make a loop with the tail behind the working yarn, insert the hook, pull up the working yarn and work 1 chain (not counted). Work the first round over the loop and the tail, then pull the tail to close the ring.
- Spiral rounds
- no joining and no turning. Mark the first stitch of each round and move the marker up as each round begins.
- Invisible decrease (invdec)
- insert the hook under the front loop only of each of the next 2 stitches, yarn over, pull through both front loops, yarn over, pull through the 2 loops on the hook.
- Changing colour
- work the last stitch of the round until two loops are left on the hook, drop the old colour to the inside of the piece, yarn over with the new colour and pull it through both loops. The small step where the colours meet sits at the start of the round, on the belly, in the bottom of the waist, where the groove hides it. Then cut the old colour and knot its tail to the new colour's starting tail inside, as the round says.
- Holding the loop
- when the pattern stops mid-body, slip the loop from your hook onto a spare stitch marker so nothing unravels, and put it back on the hook to carry on.
- Filling a bulge
- each bulge is filled through its own opening before the round that narrows it, so fill when the round says, not at the end. Push the filling in with the blunt end of the hook, a little at a time, until the bulge is firm and round and no filling shows through the fabric; then work the decrease round around it.
- Safety eyes
- the post goes through the fabric from the outside, between two stitches; the washer is pressed onto the post from the inside, ridged side toward the fabric, until it clicks. Once the washer is on it does not come off again, so every eye is placed and looked at before its washer goes on.
- Fasten off and secure
- cut the stated tail and pull it through the last loop. Pass it through the backs of at least five stitches on the inside, back through three, and trim.
Order of work. The eyes go into the head at the R6 pause, before any filling. The head and each bulge are filled as you go, each through its own opening before its waist closes, and each colour change is knotted inside its waist. Make the two antennae at any time; they go on after the body is closed. Diagram 1, Body profile shows every round from the side.
Body, one piece from the face to the tail — make 1
Yarn A Sage teal B Moss green
Start with a magic ring. Work in spiral rounds.
- R1A6 sc in the magic ring.6 sts
- R2Ainc 6.12 sts
- R3A[sc, inc] 6 times.18 sts
- R4Asc, [inc, sc 2] 5 times, inc, sc.24 sts
- R5Asc 24.24 sts
- R6Asc 24.24 sts
Slip the loop on your hook onto a spare stitch marker so it cannot unravel while you work on the face. Mark the top: counting the marked first stitch of R6 as 1, tie a short scrap of contrasting yarn through its 13th stitch. That stitch is the top of the head, T. The line of first stitches, where every colour change sits, runs along the belly. Leave the scrap in until the antennae are on. Fit the eyes now (Assembly step A), while the head is a shallow cup and you can reach inside.
- R7A[sc 2, invdec] 6 times.18 sts
Fill the head now, through the opening, while it is still wide: firm, so the head is a round ball. You can add a little more through the waist after the next round. Next round: finish its last stitch in B, leaving a 10 cm tail of B inside the body (Changing colour).
- R8A[sc, invdec] 6 times.12 sts
- A — the head, with the face, and the third bulge.
- B — the second and the fourth bulge.
- C — the antennae, on the crown just behind the scrap; the near one is drawn.
- Eye — 5 mm, on R3; the near eye is drawn where its angle from T puts it in a side view.
- T — the top: the scrap on R6, and the line straight back from it along the top.
Top up the head through the small opening if it is not firm. Cut A, leaving a 10 cm tail, and knot it to the starting tail of B inside the waist; trim both to 3 cm.
- R9B[sc, inc] 6 times.18 sts
- R10Bsc 18.18 sts
- R11Bsc 18.18 sts

Fill this bulge now, through the opening, while it is still wide: firm, so the bulge is a round ball a little wider than it is long, and even with the one before it. Then press the caterpillar belly-down on the table for a moment so the underside flattens a little. Next round: finish its last stitch in A, leaving a 10 cm tail of A inside the body (Changing colour).
- R12B[sc, invdec] 6 times.12 sts
Cut B, leaving a 10 cm tail, and knot it to the starting tail of A inside the waist; trim both to 3 cm.
- R13A[sc, inc] 6 times.18 sts
- R14Asc 18.18 sts
- R15Asc 18.18 sts
Fill this bulge now, through the opening, while it is still wide: firm, so the bulge is a round ball a little wider than it is long, and even with the one before it. Then press the caterpillar belly-down on the table for a moment so the underside flattens a little. Next round: finish its last stitch in B, leaving a 10 cm tail of B inside the body (Changing colour).
- R16A[sc, invdec] 6 times.12 sts

Cut A, leaving a 10 cm tail, and knot it to the starting tail of B inside the waist; trim both to 3 cm.
- R17B[sc, inc] 6 times.18 sts
- R18Bsc 18.18 sts
- R19Bsc 18.18 sts
Fill the last bulge now, through the opening: firm, and the same as the two before it.
- R20B[sc, invdec] 6 times.12 sts
- R21Binvdec 6.6 sts
Top up the filling through the small opening so the last bulge is as firm as the others. Fasten off, leaving a 25 cm tail. Thread the tail through the front loop of each of the six R21 stitches in order, pull to close the hole, make one small stitch across the closure and bury the tail inside the body. R1 is the middle of the face; R21 closes the tail end. The head is R1–R8, and each bulge behind it is four rounds: an increase round, two plain rounds and the decrease round that makes the waist.
Antenna — make 2
Yarn C Butter yellow
Start with a magic ring. Work in spiral rounds.
- R1C4 sc in the magic ring.4 sts
- R2–R4Csc 4.4 sts
Fasten off, leaving a 20 cm tail for sewing. Pull the ring tail tight and weave it in inside the antenna. Do not fill it. The closed ring end is the tip; the open 4-stitch rim of R4 is sewn to the head. A ring of four is the narrowest closed round this collection works: it gives a stalk about 6 mm thick, where a ring of six gives 9 mm. Work it loosely enough that the hook still turns inside the ring. Make two the same.
Assembly
How positions are given. The first stitch of every round, where the colour changes, runs along the caterpillar's belly. The top, T, is halfway round from it: the stitch the scrap marks on R6, and the stitch straight above it on every round behind. T+2 is 2 stitches toward the caterpillar's left and T−2 is 2 toward its right. Left and right are always the caterpillar's own: seen from the front, its left is on your right. Count from the scrap, never from the round marker, which drifts in a spiral. Diagram 2, Assembly order shows what happens at each pause and what waits until the body is closed.
- 1Head R1–R6 openThe face and the head's widest rounds in A, from the magic ring to R6 (24 sts); the T scrap on R6's 13th stitch. Make the two antennae at any time.
- 2A. Eyes pausedThe eye posts through R3, the left between T+3 and T+4, the right between T−3 and T−4, no washers; look from the front and from above; washers on.
- 3Head filled; first waist R8 openR7; the head filled firm through the opening; R8, its last stitch in B; topped up; A cut and knotted to B's tail inside the waist.
- 4Second bulge R9–R12 openR9–R11 in B, the bulge filled firm and the belly pressed flat; R12, its last stitch in A; B cut and knotted inside the waist.
- 5Third bulge R13–R16 openR13–R15 in A, filled and pressed; R16, its last stitch in B; A cut and knotted inside the waist.
- 6Tail bulge R17–R21, closed closedR17–R19 in B, filled to match the two before it; R20–R21; topped up; the last 6 gathered closed and the tail buried.
- 7B. Antennae closedThe open rims pinned on the head where R6 meets R7, the left at T+2 and the right at T−2, just behind and either side of the scrap; look from the front and the side; sewn; tails buried; the scrap out.
- 8Finish closedRemove the pins, settle the filling and lay the caterpillar on the table.
- open — the piece is still open: rounds continue after the step, and the inside can be reached through the opening.
- paused — crochet has stopped with the loop held on a marker; the inside is reachable through the open cup.
- closed — filled and shut; only surface stitches, with tails buried through the fabric.
Finding the rounds. R1 is the ring in the middle of the face and each round is the next ring out. R6 is the round with the scrap, the widest round of the head and the last before it narrows; R7 is the first round behind it, sloping back toward the first waist. Diagram 1, Body profile shows every round from the side.
Sewing stitches:
- Rim seam: catch both top loops of a rim stitch of the piece, then a shallow bar of the body stitch under it without going through to the inside, and go round the whole rim. Pull until the surfaces just touch.
- Bury a tail: needle into the body at the seam and out 3 cm away, tug so the end disappears, go back through a nearby stitch and trim flush.
The diagrams are flat drawings of a curved, filled surface: place, pin and look before you fix anything.
A. Eyes (at the R6 pause, before any filling)
Hold the piece with its open rim away from you and the scrap at the top: it is a shallow cup, and the ring in its middle is the middle of the face. Diagram 3, Head map shows the rings, both eye positions and where the antennae go later.

| Left eye | Right eye | |
|---|---|---|
| Post | R3, between T+3 and T+4 | R3, between T−3 and T−4 |
- Find T on R3: it is the R3 stitch on the line from the centre of the ring to the scrap. Count 3 stitches toward the caterpillar's left (your right) and push an eye's post through the gap just past the third stitch, from the outside, without its washer.
- Place the other eye the same way on the other side. Look at the face from the front: both eyes a little above the middle of the ring, level with each other and the same distance from it. Look from above: both posts the same distance from the rim. Move a post one gap if they are not.
- Press both washers on from the inside.
The eyes sit wide apart, a little above the middle of the face, with nothing else on it.
- Eyes — 5 mm, each post in a gap on R3, a little above the middle of the face: between T+3 and T+4 for the left eye, T−3 and T−4 for the right.
- Sewn edges — each antenna's open rim, centred where R6 meets R7 at T+2 (left) and T−2 (right).
- T — the top: the scrap tied through the 13th stitch of R6, and the line from it to the centre of the ring; the thin ring is the edge of R6.
If you would rather have no plastic parts, embroider the eyes instead: at the same pause, with black cotton, work small straight stitches over the same gap, one over another, until a round dot about 5 mm across stands. Knot the ends inside the cup.
B. Antennae (after the body is closed)
Each antenna is sewn on by its open rim to the top of the head, one on each side of the scrap and just behind it, where the head starts to slope back toward the first waist. Diagram 3, Head map shows both places.

| Left antenna | Right antenna | |
|---|---|---|
| Middle of the rim | where R6 meets R7, at T+2 | where R6 meets R7, at T−2 |
- The scrap marks T on R6. Count 2 stitches along R6 toward the caterpillar's left and pin the middle of the left antenna's rim over the line between that stitch and the R7 stitch behind it, the rim flat all the way round. R7 slopes back toward the waist, so an antenna pinned flat there stands up leaning forward; if it stands straight up, push the back edge of its rim a little further down the slope as you pin.
- Pin the right antenna the same way at T−2.
- Look from the front: both antennae stand at the same height, one on each side of the top of the head, about a finger's width apart. Look from the side: both lean forward the same amount. Move pins until they do.
- Sew each rim all round with a rim seam, using the antenna's tail. Bury the tail into the head. Take out the scrap.
The antennae stand up from the top of the head, leaning a little forward, one each side of the middle. If one leans over sideways, take one more stitch from its rim into the head on the side it leans away from.
Finishing
Remove any pins. Lay the caterpillar on its belly and roll each bulge gently under your palm to settle the filling, then press it belly-down on the table for a moment so it lies straight. Do not block, steam or starch.
Your caterpillar should lie flat and straight on its four bulges, its head a little larger than the rest, each colour ending in the bottom of a waist and its two antennae leaning forward above its face. If a waist looks shallow, push the filling away from it into the bulges on either side with your fingertips through the fabric.
Care: spot-clean only, and dry flat away from heat.
What is checked
passed
Stitch check: every round's count recomputed from the stitch record
passed
Placement check: every placement checked against the rounds it names
passed
Diagram check: every diagram checked against the same record
2
finished makes from the written pattern
4
photos of finished makes
Using this pattern
The toys you make from this pattern are yours to keep, give or sell. The pattern itself is for your personal use: please do not share, copy or resell it.
Safety
This pattern uses plastic safety eyes, which are not suitable for toys for children under three. If you would rather have no plastic parts, embroider the eyes instead.
Not for children under three. A handmade toy has not been safety-tested, so sew every part on firmly, and check the seams and stuffing before you give it to a child and every so often after.
Illustrations are generated previews. Your finished piece will differ with yarn, hook, tension and stuffing. © 2026 Anastasia Marchenko